
These baked taquitos combine a savory shredded chicken filling with melted cream cheese for a satisfying, crunchy meal. They are an efficient alternative to fried versions, providing a crispy exterior using only a small amount of oil.
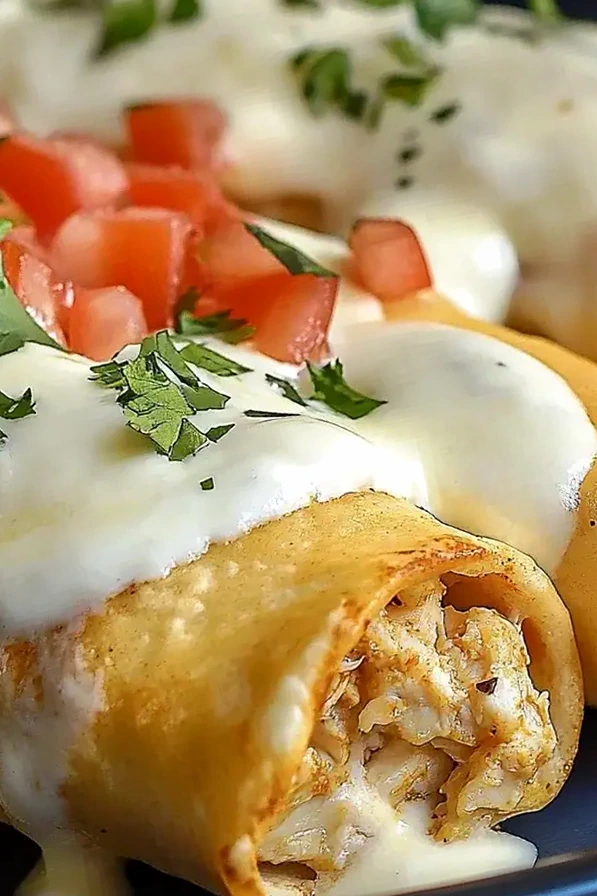
List of ingredients
- 2 cups cooked chicken, shredded – rotisserie chicken is a fast option.
- 4 oz cream cheese, softened – ensures a smooth blend.
- ½ cup shredded cheddar cheese – provides a sharp flavor.
- ¼ cup salsa – adds moisture and acidity.
- 1 tsp garlic powder – for a savory base.
- 1 tsp onion powder – enhances the depth of flavor.
- 1 tsp cumin – adds a classic earthy note.
- Salt and pepper, to taste – for seasoning.
- 10 small flour or corn tortillas – serves as the outer shell.
- Cooking spray or olive oil – used for brushing to achieve a gold finish.
step-by-step instructions
- Preheat Oven: Set your oven to 425°F (220°C). Line a large baking sheet with parchment paper to prevent sticking.
- Make the Filling: In a mixing bowl, combine shredded chicken, softened cream cheese, cheddar cheese, salsa, garlic powder, onion powder, cumin, salt, and pepper. Stir until the mixture is cohesive and creamy.
- Assemble Taquitos: Portion 2–3 tablespoons of the filling onto each tortilla. Roll the tortilla tightly around the filling and place it on the baking sheet with the seam side facing down.
- Bake: Lightly coat the top of each taquito with cooking spray or brush with olive oil. Bake for 15–18 minutes until the shells are golden and crisp.
- Serve: Remove from the oven and serve immediately with sides such as sour cream, guacamole, or extra salsa.
Ways to Enhance the Filling
Adding Black Beans and Corn for Texture
Stirring in rinsed canned black beans or thawed frozen corn increases the nutritional value and adds a pleasant pop of texture. Ensure the vegetables are well-drained before adding them to prevent the filling from becoming too watery.
Incorporating Fresh Aromatics
For a fresher taste, fold in finely diced white onions or minced fresh garlic. If using raw onions, consider sautéing them briefly first to remove the harsh bite and blend better with the melted cheese.
Adjusting the Heat Level
Increase the spiciness by adding diced jalapeños, a pinch of cayenne pepper, or a teaspoon of chipotle powder. For a smoky flavor, smoked paprika can be used as a partial replacement for the cumin.
Using Different Salsa Varieties
While red salsa is traditional, salsa verde (tomatillo salsa) provides a tangier, brighter flavor profile. Adjust the amount of salsa carefully, as adding too much can make the tortillas soggy during the baking process.
Tortilla Selection and Preparation
Benefits of Corn Tortillas
Corn tortillas offer a more traditional flavor and a firmer crunch once baked. They are naturally gluten-free, making this recipe accessible to those with dietary restrictions.
Benefits of Flour Tortillas
Flour tortillas are more flexible and less prone to cracking during the rolling process. They result in a slightly softer, more pastry-like crust compared to the crispness of corn.
Preventing Tortilla Cracking
Warm corn tortillas in a damp paper towel in the microwave for 20–30 seconds before rolling. This softens the starch and makes them pliable, preventing the edges from splitting.
Ensuring a Tight Roll
Press the filling firmly into the tortilla as you roll to eliminate air pockets. This prevents the taquito from expanding or unrolling during the high-heat baking process.
Baking and Texture Optimization
Achieving the Perfect Golden Brown Finish
Brushing the tortillas with olive oil or using a high-quality cooking spray is essential for heat conduction. This thin layer of fat allows the tortilla to fry slightly in the oven, creating a professional-looking gold color.
Avoiding Soggy Bottoms
Always use parchment paper or a silicone baking mat on your sheet. This prevents the bottom of the taquito from sticking and allows air to circulate more evenly around the base.
Using an Air Fryer for Faster Results
For a smaller batch, place the assembled taquitos in an air fryer basket in a single layer. Cook at 400°F for 7–10 minutes, turning halfway through, for an extremely crispy shell.
Managing Oven Hot Spots
Rotate the baking sheet halfway through the 15–18 minute cook time. This ensures that taquitos near the back of the oven do not burn while those in the front remain pale.
Serving and Platter Ideas
Classic Mexican Dipping Sauces
Serve taquitos with a trio of dips: cool sour cream to balance the heat, chunky guacamole for richness, and a spicy salsa roja for acidity. These contrast well with the creamy interior of the taquitos.
Pairing with Fresh Side Dishes
Complement the meal with a side of Mexican street corn (elote) or a crisp cabbage slaw with lime and cilantro. A side of seasoned black beans or cilantro-lime rice turns the appetizer into a full dinner.
Arranging for Party Platters
Stack the taquitos in a pyramid shape on a large platter and garnish with sliced radishes and fresh cilantro leaves. Place the dipping bowls in the center for an organized and appealing presentation.
Adding a Citrus Finish
Squeeze fresh lime juice over the taquitos immediately after they leave the oven. The acidity cuts through the richness of the cream cheese and brightens the overall flavor profile.
Storage and Preservation
Refrigerating Leftovers
Store leftover taquitos in an airtight container in the refrigerator for up to three days. Keep them in a single layer or separate them with parchment paper to prevent them from sticking together.
Freezing Unbaked Taquitos
Assemble the taquitos and place them on a tray in the freezer for one hour to flash-freeze. Once hardened, transfer them to a freezer-safe bag to prevent them from merging into a single block.
Freezing Baked Taquitos
Allow baked taquitos to cool completely before freezing them in an airtight bag. This method is ideal for quick snacks that only require a few minutes of reheating.
Maintaining Filling Integrity
When freezing, ensure the cream cheese is fully blended. This prevents the cheese from separating or leaking during the freezing and thawing process.
Effective Reheating Methods
Oven Reheating for Maximum Crunch
Place refrigerated taquitos on a baking sheet at 350°F for 10 minutes. This is the best method for restoring the original crispy texture of the tortilla.
Using the Air Fryer to Restore Texture
Reheat at 375°F for 3–5 minutes. The rapid air circulation removes any moisture that accumulated during refrigeration, making them taste freshly baked.
Microwave Reheating for Speed
Heat on a microwave-safe plate for 45–60 seconds. Note that this will make the tortilla soft rather than crispy, so it is best for those who prefer a softer texture.
Reheating Frozen Taquitos
Bake frozen unbaked taquitos at 425°F for 20–25 minutes. There is no need to thaw them first, as the high heat cooks the center while crisping the outside.
Troubleshooting Common Issues
Filling Leaking During Baking
If the filling leaks, you may be overfilling the tortillas or not rolling them tightly enough. Use exactly 2–3 tablespoons and ensure the seam is pressed firmly against the pan.
Tortillas Burning Before Center Heats
If the shells brown too quickly, lower the oven temperature to 400°F and increase the bake time by 2–3 minutes. Ensure your oven is fully preheated before adding the tray.
Filling Too Loose to Roll
If the mixture is too soft, refrigerate the filling for 30 minutes before assembling. This firms up the cream cheese and makes the rolling process much easier.
Tortillas Becoming Soggy
Sogginess usually occurs if too much salsa is used or if the taquitos are stacked during cooling. Allow them to rest on a wire rack for two minutes after baking to let steam escape.
Frequently Asked Questions
Can I use rotisserie chicken?
Yes, rotisserie chicken is highly recommended as it is already cooked and seasoned, which reduces prep time and adds a deeper flavor to the filling.
Which cream cheese is best for this recipe?
Full-fat brick cream cheese is best for the creamiest texture and best melt. Low-fat versions can be used, but they may result in a slightly thinner filling.
Can I make these dairy-free?
You can substitute the cream cheese with a plant-based cream cheese alternative and use vegan shredded cheddar. The baking process remains exactly the same.
How many taquitos can I make per batch?
A standard large baking sheet can comfortably hold 10 to 15 taquitos. Avoid overcrowding the pan, as this can lead to uneven browning and steaming instead of crisping.
Can I use a different type of cheese?
Yes, Monterey Jack, Pepper Jack, or Oaxaca cheese are excellent substitutes for cheddar. Pepper Jack is particularly good if you want an integrated spicy kick.
Print
Crispy Baked Cream Cheese Chicken Taquitos
- Total Time: 25 minutes
- Yield: 10 taquitos 1x
- Diet: General
Description
Crispy on the outside, creamy and cheesy on the inside, these Baked Cream Cheese Chicken Taquitos are a quick and flavorful meal the whole family will devour. Perfect for busy weeknights, party platters, or freezer-friendly prep!
Ingredients
- 2 cups cooked chicken, shredded
- 4 oz cream cheese, softened
- ½ cup shredded cheddar cheese
- ¼ cup salsa
- 1 tsp garlic powder
- 1 tsp onion powder
- 1 tsp cumin
- Salt and pepper, to taste
- 10 small flour or corn tortillas
- Cooking spray or olive oil for brushing
Instructions
- Preheat Oven: Preheat your oven to 425°F (220°C). Line a baking sheet with parchment paper.
- Make the Filling: In a large bowl, combine the shredded chicken, softened cream cheese, cheddar cheese, salsa, garlic powder, onion powder, cumin, salt, and pepper. Mix until creamy and well blended.
- Assemble Taquitos: Place 2–3 tablespoons of filling onto each tortilla and roll tightly. Place seam-side down on the prepared baking sheet.
- Bake: Lightly brush or spray the tops with olive oil or cooking spray. Bake for 15–18 minutes until golden and crispy.
- Serve: Enjoy hot with sour cream, guacamole, or extra salsa for dipping!
Notes
Warm tortillas slightly before rolling to prevent cracking. These freeze well! Assemble ahead, freeze, and bake straight from the freezer—just add 5 extra minutes to the bake time. Rotisserie chicken is a great shortcut here! Add diced jalapeños for a spicy kick or mix in black beans for extra heartiness.
- Prep Time: 10 minutes
- Cook Time: 15 minutes
- Category: Main course
- Method: Baking
- Cuisine: Mexican-Inspired
Nutrition
- Serving Size: 1 taquito
- Calories: 180 kcal
- Sugar: 1 g
- Sodium: 260 mg
- Fat: 10 g
- Saturated Fat: 4 g
- Unsaturated Fat: 5 g
- Trans Fat: 0 g
- Carbohydrates: 12 g
- Fiber: 1 g
- Protein: 11 g
- Cholesterol: 35 mg