
This classic chicken pot pie features a creamy, homemade filling packed with vegetables and topped with a flaky crust. It is a hearty meal that avoids processed canned soups for a fresher, more traditional taste.
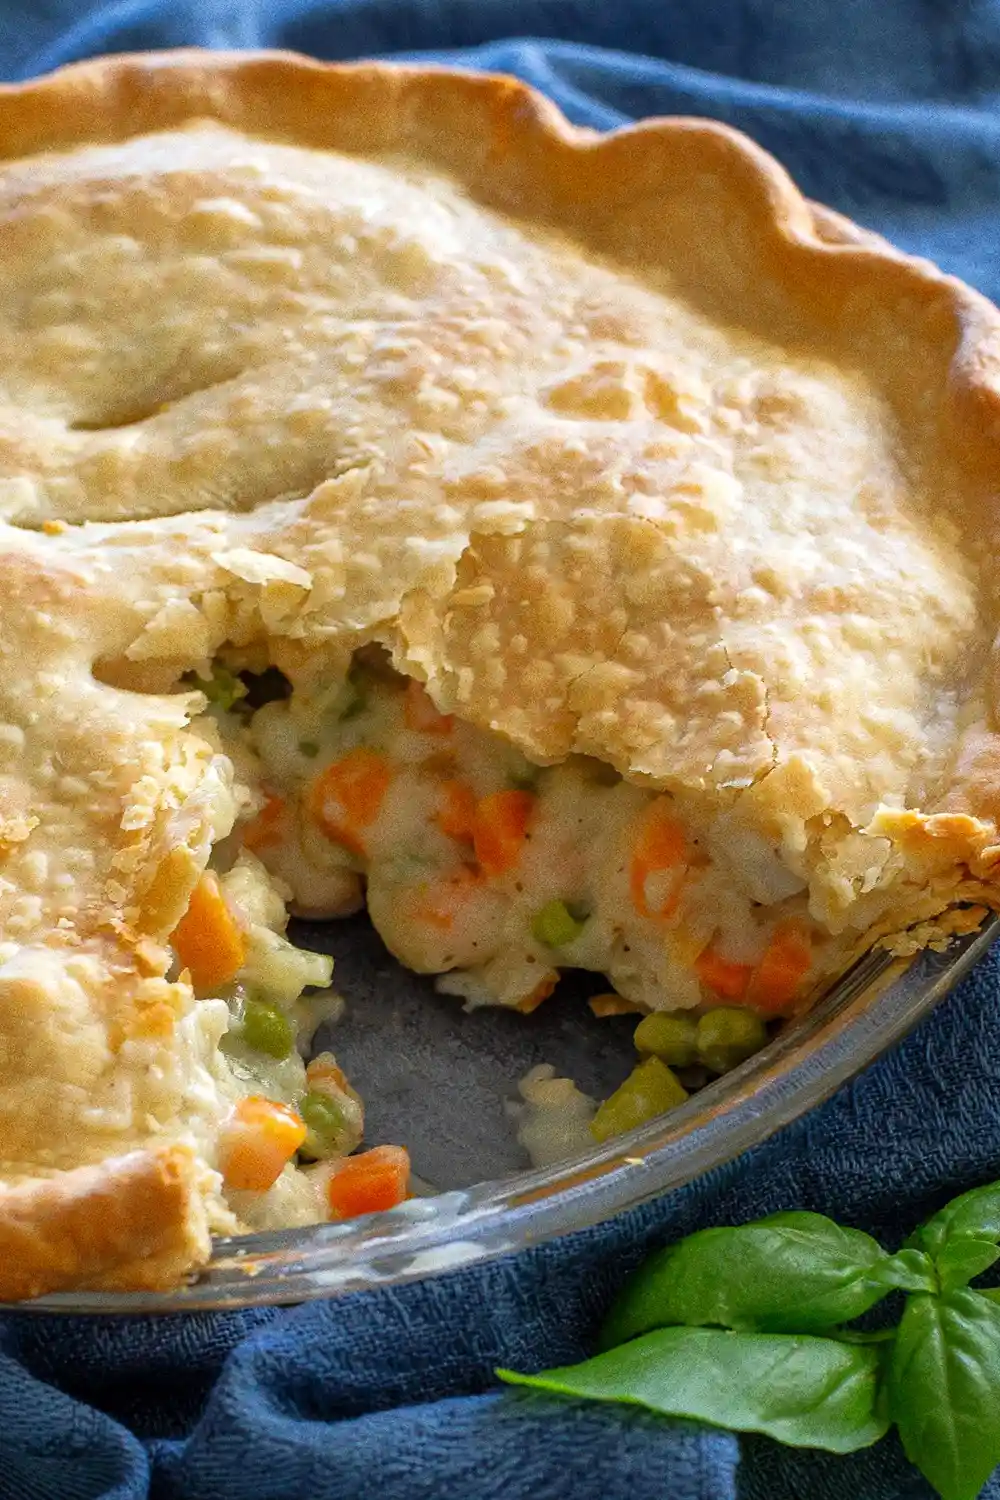
List of ingredients
- 1 pound skinless boneless chicken breasts, cubed – provides the main protein.
- 1/2 cup sliced celery – adds crunch and aromatic flavor.
- 1 cup sliced carrots – provides sweetness and color.
- 1 cup frozen peas – adds pops of green and texture.
- 1/3 cup butter – used for sautéing and creating the roux.
- 1/3 cup chopped onion – creates a savory base.
- 1/3 cup all-purpose flour – thickens the sauce.
- 1/2 teaspoon salt – enhances all flavors.
- 1/4 teaspoon pepper – adds a subtle hint of spice.
- 1/4 teaspoon celery seed – a secret ingredient for traditional depth.
- 1§ cups chicken broth – the liquid base for the filling.
- 2/3 cup milk – adds creaminess to the sauce.
- 2 (9-inch) unbaked pie crusts (store bought or homemade) – for the bottom and top layers.
step-by-step instructions
- Prepare the oven: Preheat your oven to 425 degrees F (220 degrees C).
- Prep the bottom crust: Place one of the crusts in the bottom of a deep dish pie pan and prick it with a fork. To avoid a soggy bottom, bake the crust alone for 5 minutes before adding the filling.
- Cook the vegetables and meat: In a large pot, combine the raw cubed chicken, carrots, peas, and celery. Add enough water to cover the ingredients and boil for 15 minutes, then remove from heat and drain the mixture into a bowl.
- Create the creamy sauce: In a saucepan over medium heat, melt the butter and cook the onions until they are soft and translucent. Stir in the flour, salt, pepper, and celery seed.
- Thicken the filling: Slowly stir in the chicken broth and milk. Simmer the mixture over medium-low heat until it becomes thick and smooth.
- Combine ingredients: Remove the sauce from the heat and mix it with the drained chicken and vegetable mixture in a large pot or bowl.
- Assemble the pie: Pour the chicken filling on top of the pre-baked bottom crust. Cover with the second crust, seal the edges tightly, and trim away any excess dough. Cut several small slits in the top crust to let steam escape during baking.
- Bake and cool: Bake on a baking sheet for 25 to 30 minutes, or until the pastry is golden brown and the filling is bubbling. Let the pie cool for 10 minutes before slicing and serving.
Customizing the Filling
Using Pre-Cooked Chicken
You can substitute the raw chicken breasts with rotisserie chicken or leftover roasted chicken. Simply cube the meat and stir it into the sauce at the end of the process. This reduces the initial boiling step and adds a deeper roasted flavor.
Incorporating Root Vegetables
For a heartier filling, add diced potatoes or parsnips during the boiling phase. Ensure they are cut into small, uniform cubes so they cook at the same rate as the carrots. This adds a rustic texture and increases the nutritional value of the meal.
Adding Different Green Vegetables
While peas are traditional, you can incorporate sliced green beans or chopped spinach. If using spinach, stir it in at the very end so it wilts from the residual heat without overcooking. This provides a fresh, earthy contrast to the creamy sauce.
Enhancing the Savory Profile
For extra depth, add a teaspoon of garlic powder or a pinch of thyme to the flour mixture. These herbs complement the celery seed and provide a more complex flavor profile. Be careful not to over-season, as the chicken broth already contains salt.
Crust Variations and Tips
Substituting with Puff Pastry
For a lighter and fluffier top, use a sheet of frozen puff pastry instead of a traditional pie crust. Only use the puff pastry for the top layer to ensure the bottom remains stable. This creates a dramatic, airy lift that looks professional.
Making a Homemade Buttery Crust
If making your own crust, use chilled butter and ice water to ensure the pastry remains flaky. Work the dough as little as possible to avoid developing too much gluten. A cold crust results in a more tender and crisp finish after baking.
Preventing a Soggy Bottom
Pre-baking the bottom crust for a few minutes creates a barrier that prevents the sauce from soaking in. Additionally, placing the pie pan on a preheated baking sheet helps cook the bottom crust more efficiently. This ensures a crisp foundation for the filling.
Creating Effective Steam Vents
Cutting slits in the top crust is essential to prevent the pastry from bursting or becoming soggy from trapped steam. You can use a sharp knife to make simple lines or a pastry cutter for decorative shapes. Ensure the vents are evenly spaced across the entire surface.
Perfecting the Sauce Consistency
Adjusting Flour for Thickness
If you prefer a thicker filling, add an extra tablespoon of flour to the butter and onion mixture. Let the flour cook for a minute to remove the raw taste before adding liquids. A thicker sauce helps the pie hold its shape better when sliced.
Ensuring a Smooth Roux
Whisk the flour into the melted butter and onions thoroughly to create a smooth paste. Slowly incorporate the broth and milk while whisking constantly to prevent lumps. If lumps form, you can use a whisk or a blender to smooth the sauce before adding the chicken.
Managing Liquid Temperatures
Using room temperature milk and broth prevents the butter from seizing when added to the pan. If the liquids are too cold, the sauce may take longer to thicken and could separate. This ensures a velvety, cohesive texture throughout the filling.
Serving Suggestions
Pairing with Fresh Greens
A crisp green salad with a light vinaigrette balances the richness of the creamy pot pie. Use a mix of arugula, romaine, and baby spinach with a lemon-based dressing. The acidity cuts through the butter and milk, refreshing the palate between bites.
Adding Garlic-Infused Breads
Serve the pie with toasted garlic bread or warm cheddar biscuits for added texture. The crunch of the toast complements the softness of the filling. This makes the meal even more filling and satisfying for a family dinner.
Complementing with Side Grains
While the pie contains vegetables and pastry, a side of wild rice or quinoa can add a nutty flavor. This is particularly useful if you are serving the pie to a larger group. It ensures everyone leaves the table feeling completely full.
Storage and Preservation
Refrigerating Leftovers
Store leftover pie in an airtight container in the refrigerator for up to three to four days. Ensure the pie has cooled completely before sealing to prevent condensation from making the crust soggy. Keep slices separated with parchment paper to maintain their shape.
Freezing Unbaked Pies
You can assemble the pie and freeze it before baking for a quick future meal. Wrap the pie tightly in plastic wrap and then a layer of aluminum foil to prevent freezer burn. Store it in the freezer for up to two months.
Freezing Baked Portions
Baked slices can be frozen individually for easy portion control. Wrap each slice tightly and label them with the date. This is an excellent way to preserve the meal for individual lunches throughout the week.
Reheating Methods
Using the Oven for Crispiness
To maintain the flaky texture of the crust, reheat slices in the oven at 350 degrees F. Cover the top loosely with foil to prevent the pastry from burning while the center warms. Heat for about 10 to 15 minutes until the filling is bubbling.
Quick Microwave Reheating
For a faster option, microwave a slice on medium power for 1 to 2 minutes. Be aware that this method will soften the crust, making it less crisp. To mitigate this, avoid overcooking the slice, which can make the pastry chewy.
Avoiding Crust Softening
If you must use a microwave, place a damp paper towel over the slice to keep the filling moist. Immediately after microwaving, let the slice sit for one minute to allow the heat to redistribute. This prevents the edges from becoming hard while the center remains cold.
Common Troubleshooting
Solving Underbaked Crusts
If the top is golden but the bottom is pale, move the pie rack to the lowest position in the oven. This allows the heat to reach the bottom of the pan more directly. You can also increase the oven temperature by 10 degrees for the last five minutes.
Fixing a Runny Filling
If the filling is too liquid after simmering, mix a small amount of cornstarch with water to create a slurry. Stir this slurry into the simmering sauce and cook for another two minutes. This will quickly thicken the filling without altering the flavor.
Preventing Overcooked Chicken
Avoid boiling the chicken for longer than the specified 15 minutes to prevent it from becoming tough. If using pre-cooked chicken, add it at the very end just to heat through. This keeps the meat tender and juicy within the creamy sauce.
Frequently Asked Questions
Can I use rotisserie chicken?
Yes, rotisserie chicken is an excellent time-saver. Simply shred or cube the meat and stir it into the thickened sauce before filling the pie crust.
What is the purpose of celery seed?
Celery seed provides a concentrated, earthy flavor that mimics the taste of traditional pot pies. It adds a distinct aromatic quality that salt and pepper alone cannot achieve.
How do I store the pie?
Keep the pie in an airtight container in the refrigerator for up to four days. For longer storage, you can freeze slices individually wrapped in foil.
Can I make this dairy-free?
You can substitute butter with a plant-based butter alternative and milk with unsweetened almond or soy milk. Ensure the plant-based milk is unsweetened to avoid changing the savory flavor of the pie.
Which pie pan works best?
A deep-dish 9-inch pie pan is recommended to accommodate the volume of the filling. Using a shallow pan may result in the filling overflowing during the baking process.
Print
Classic Creamy Chicken Pot Pie
- Total Time: 50 minutes
- Yield: 8 servings 1x
- Diet: General
Description
This homemade Chicken Pot Pie is a classic chicken pot pie with vegetables and a creamy filling without cream of anything soup. A store bought crust makes this come together fast for a weeknight meal.
Ingredients
- 1 pound skinless boneless chicken breasts, cubed
- 1/2 cup sliced celery
- 1 cup sliced carrots
- 1 cup frozen peas
- 1/3 cup butter
- 1/3 cup chopped onion
- 1/3 cup all-purpose flour
- 1/2 teaspoon salt
- 1/4 teaspoon pepper
- 1/4 teaspoon celery seed
- 1¾ cups chicken broth
- 2/3 cup milk
- 2 (9-inch) unbaked pie crusts
Instructions
- Preheat: Preheat oven to 425 degrees F (220 degrees C.)
- Prepare Bottom Crust: Place one of the crusts in the bottom of a deep dish pie pan and prick with a fork. Bake for 5 minutes.
- Cook Vegetables and Chicken: In a large pot, combine the raw chicken, carrots, peas, celery. Add water to cover and boil for 15 minutes. Remove from heat, drain into a bowl and set aside chicken mixture.
- Create Sauce: In the saucepan over medium heat, melt butter and cook onions in butter until soft and translucent. Stir in flour, salt, pepper, and celery seed. Slowly stir in chicken broth and milk. Simmer over medium-low heat until thick.
- Combine: Remove from heat and combine the sauce with the chicken, carrots, peas, and celery mixture in a large pot or bowl.
- Assemble Pie: Place the chicken filling on top of the bottom crust. Cover with top crust, seal edges, and cut away excess dough. Make several small slits in the top to allow steam to escape.
- Bake: Bake in the preheated oven for 25 to 30 minutes on a baking sheet, or until pastry is golden brown and filling is bubbly. Cool for 10 minutes before serving.
Notes
This recipe freezes well; store in the freezer up to three months. To reheat, either bake covered with foil from frozen or thaw and then bake. Pairs well with a green salad and garlic bread.
- Prep Time: 15 minutes
- Cook Time: 35 minutes
- Category: Main Course
- Method: Baking
- Cuisine: American
Nutrition
- Serving Size: 1 slice
- Calories: 420 kcal
- Sugar: 6 g
- Sodium: 680 mg
- Fat: 22 g
- Saturated Fat: 11 g
- Unsaturated Fat: 11 g
- Trans Fat: 0 g
- Carbohydrates: 36 g
- Fiber: 3 g
- Protein: 18 g
- Cholesterol: 85 mg