
This classic, velvety queso dip combines savory ground beef with the zesty kick of fire-roasted tomatoes and green chilies. It is the ultimate crowd-pleaser for any gathering, requiring only a few pantry staples and about twenty minutes of your time. This dip remains a staple for game days and casual dinners because it is consistently creamy and deeply satisfying.
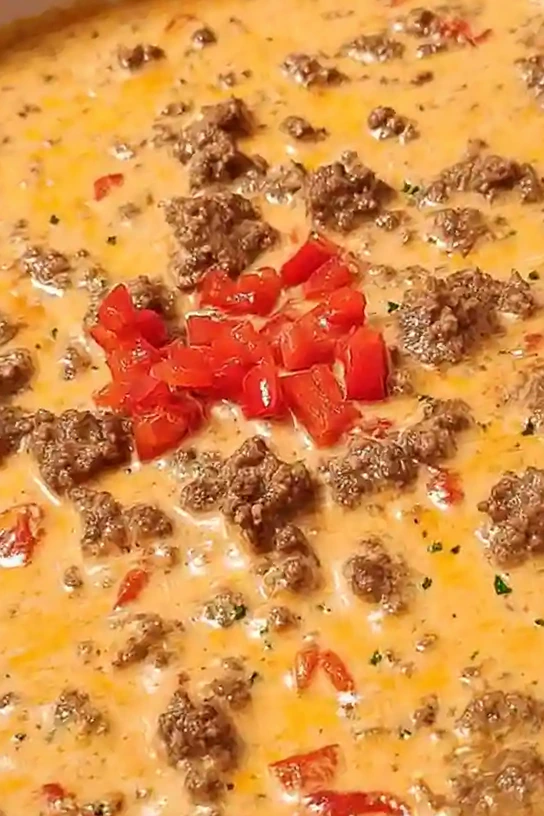
List of ingredients
- 16 ounces Velveeta cheese
- 10 ounces canned Rotel tomatoes
- 1 pound ground beef
step-by-step instructions
- Step: Brown the ground beef in a skillet until fully cooked.
- Step: Add the cubed Velveeta cheese into the skillet with the beef.
- Step: Pour in the canned Rotel tomatoes.
- Step: Stir the mixture thoroughly until the cheese is completely melted and smooth.
Refining your beef cooking process
Achieving the perfect texture
When cooking the ground beef, aim for a very fine crumble rather than large clumps. A finer texture allows the cheese to cling to the meat more effectively, creating a better experience in every bite. If you find the meat is in large pieces, use a potato masher after browning to break it down further before adding the cheese.
Managing rendered fat
It is crucial to drain the fat after browning the meat, as excess grease can cause the cheese sauce to separate or look oily. Use a slotted spoon to transfer the meat to a paper towel-lined plate before returning it to the pan, or simply tilt the skillet carefully to pour off the excess liquid into a heat-safe container.
Selecting the right melting cheese
Understanding processed cheese behavior
Processed melting cheese is designed specifically to remain emulsified even at high temperatures, preventing the oily separation often seen with natural shredded cheeses. This makes it the superior choice for dips that need to stay warm on a buffet table for an extended period. If you choose to mix in other cheeses for flavor, ensure that the processed cheese makes up at least seventy percent of the total volume to maintain stability.
Avoiding graininess
If you decide to incorporate shredded cheddar or monterey jack for extra sharpness, shred them by hand from a block. Pre-shredded bags contain anti-caking agents like potato starch or cellulose that prevent the cheese from melting into a truly smooth, silky sauce.
Flavor enhancements and customization
Incorporating fresh aromatics
While the recipe is delicious as is, you can sauté finely diced white onion or fresh minced garlic along with the beef. This adds a depth of savory, caramelized flavor that pairs beautifully with the heat from the green chilies. Ensure the onions are translucent and fully softened before you add the cheese to the pan.
Adjusting the spice levels
If your group enjoys a bolder flavor profile, add a teaspoon of chili powder or ground cumin to the beef as it browns. A small splash of hot sauce or a dash of smoked paprika can also introduce a complex, woody heat that contrasts nicely with the richness of the dairy.
Serving strategies for parties
Creating a diverse dipping spread
To provide a well-rounded snack platter, pair the dip with more than just standard tortilla chips. Fresh vegetable batons such as bell pepper strips, carrots, and celery add a refreshing crunch. Sturdy crackers, toasted baguette slices, or even warm soft pretzel bites are excellent alternatives that hold up well under the weight of the thick, cheesy mixture.
Maintaining temperature
Queso is best enjoyed at a temperature of around 140 to 150 degrees Fahrenheit. If you are serving this for a long movie night or a party, consider transferring the finished dip to a small slow cooker set to the “warm” or “low” setting. This prevents the edges from cooling and becoming firm, ensuring the last spoonful is just as creamy as the first.
Storage and reheating
Proper cooling procedures
Always allow the dip to reach room temperature before sealing it in an airtight container for refrigerator storage. Placing hot containers directly into the fridge can raise the internal temperature of your appliance and potentially lead to bacterial growth in other sensitive items nearby. Store the dip in the back of the refrigerator where temperatures remain most consistent.
Refreshing the dip after storage
Because the cheese firms up when cold, you may notice it looks slightly thicker after being refrigerated. When reheating on the stove, add one or two tablespoons of milk or water to the pan. This small amount of extra liquid will help reconstitute the emulsion as the cheese melts, bringing back that original glossy, pourable consistency.
Common questions regarding preparation
Can I make this dip ahead of time?
Absolutely. You can prepare the entire mixture up to twenty-four hours before your event. Simply follow the cooking steps, let it cool completely, and store it covered in the refrigerator. When you are ready to serve, reheat it slowly in a saucepan over low heat, adding a tiny splash of milk if necessary to regain the proper texture.
Is it possible to freeze the leftover dip?
While technically possible, freezing is not recommended for this recipe. Upon thawing, the emulsifiers in the processed cheese often break down, leading to a grainy or curdled appearance. It is much better to prepare only what you anticipate consuming within three to four days to enjoy the dip at its peak quality.
Why does my dip sometimes separate?
Separation usually occurs if the dip is exposed to temperatures that are too high, or if it is kept on a heat source for too long without stirring. Always keep the heat on low and stir the mixture every ten minutes during service to redistribute the heat and keep the proteins in the cheese properly suspended.
How do I make the dip thinner or thicker?
If you prefer a thinner consistency, increase the amount of liquid added by stirring in a small splash of vegetable broth or milk during the final melting stage. If you find the dip is too thin, it is likely due to the liquid in the canned tomatoes. You can remedy this by simmering the tomatoes with the beef for a few minutes to evaporate excess moisture before adding the cheese blocks.
Can I add protein variations?
You can experiment with cooked turkey crumbles or plant-based protein crumbles. If using a meatless alternative, ensure you brown it in a small amount of oil, as these products often lack the natural fat content of ground beef. This ensures that the texture remains satisfyingly hearty while maintaining the signature flavor profile of this classic dish.
Print
Classic Creamy Ground Beef and Rotel Queso
- Total Time: 20 minutes
- Yield: 6 servings 1x
- Diet: Gluten-Free
Description
A cheesy and flavorful dip made with Velveeta cheese and Rotel tomatoes, perfect for parties and game days.
Ingredients
- 16 ounces Velveeta cheese
- 10 ounces canned Rotel tomatoes
- 1 pound ground beef
Instructions
- Step: Brown the ground beef in a skillet until fully cooked.
- Step: Add the cubed Velveeta cheese into the skillet with the beef.
- Step: Pour in the canned Rotel tomatoes.
- Step: Stir the mixture thoroughly until the cheese is completely melted and smooth.
Notes
For added flavor, include spices like garlic powder or onion powder. Use hot Rotel for extra spiciness and consider toppings like green onions or jalapeños. Leftovers can be stored in the fridge for 3-4 days.
- Prep Time: 10 minutes
- Cook Time: 10 minutes
- Category: Appetizer
- Method: Stovetop
- Cuisine: American
Nutrition
- Serving Size: 1 serving
- Calories: 300 kcal
- Sugar: 5 g
- Sodium: 850 mg
- Fat: 18 g
- Saturated Fat: 9 g
- Unsaturated Fat: 6 g
- Trans Fat: 0 g
- Carbohydrates: 12 g
- Fiber: 1 g
- Protein: 22 g
- Cholesterol: 70 mg