
This baked orange chicken offers a healthier alternative to deep-frying while maintaining a satisfyingly crisp exterior. It features a bold, tangy sauce that brings the flavors of a classic takeout dish into your home kitchen in just 30 minutes.
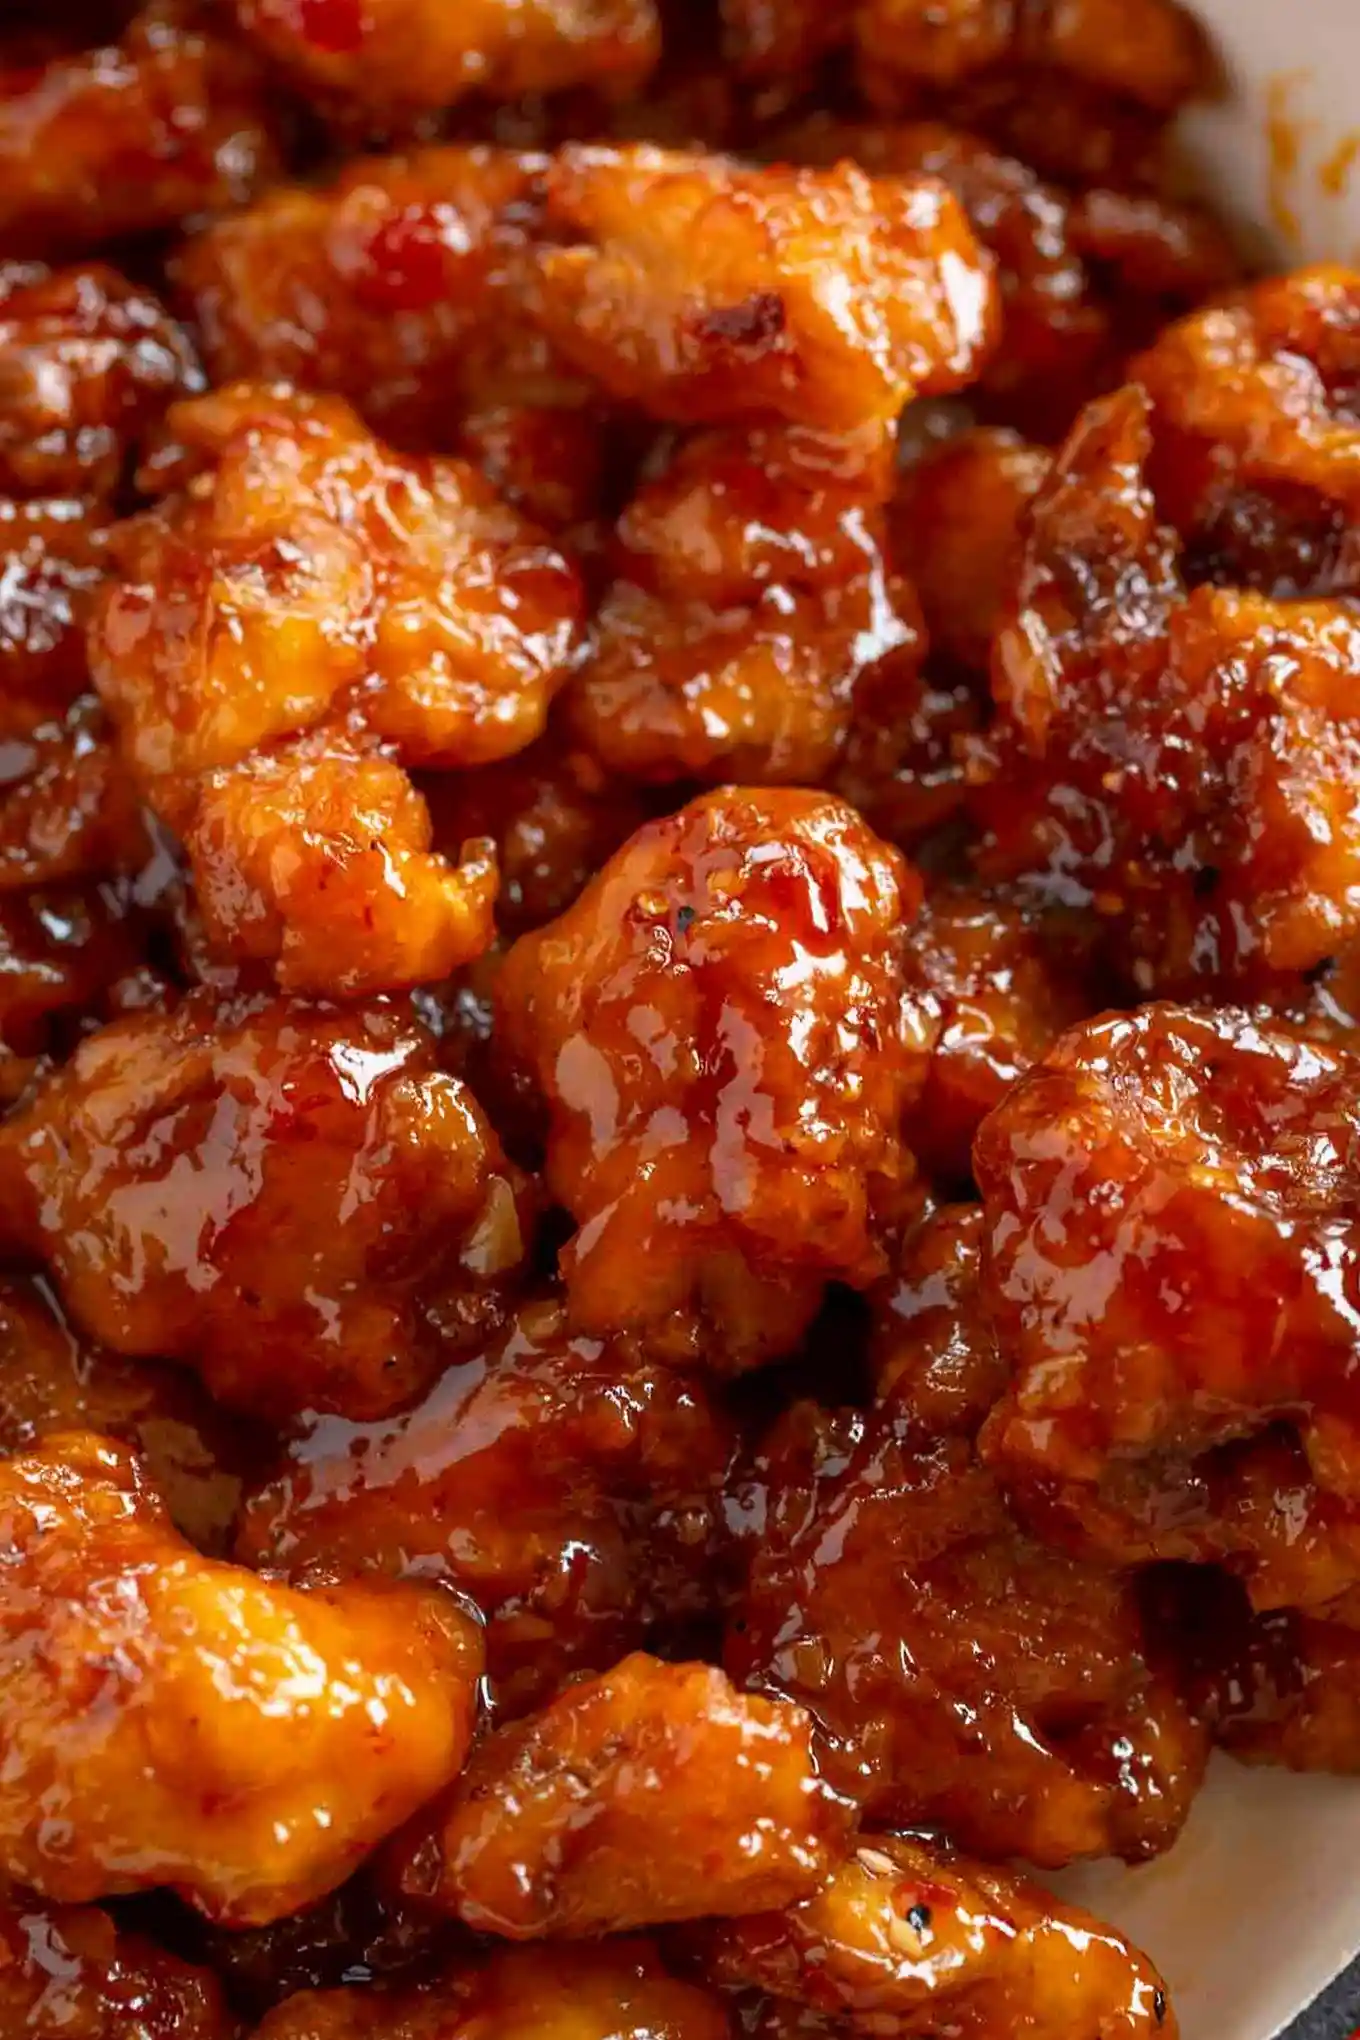
List of ingredients
- 1 cup panko breadcrumbs – pulsed in a processor for a finer texture.
- 2 pounds chicken thighs, boneless and skinless – cut into small, even chunks.
- 2 large eggs, beaten – used as a binder for the coating.
- 1/2 cup flour – ensures the breading sticks to the chicken.
- 1 tablespoon vegetable oil, divided – for coating the chicken and sautéing aromatics.
- 1 1/2 tablespoons fresh ginger, minced – provides a sharp, aromatic heat.
- 2 teaspoons garlic, minced – adds a savory base to the glaze.
- 1/2 teaspoon crushed red pepper – adds a subtle spicy kick.
- 1 tablespoon cornstarch – used to thicken the sauce to a glossy consistency.
- 2 tablespoons vegetable broth – a clean substitute for rice wine.
- 1/4 cup orange juice, fresh – provides the primary citrus flavor.
- 1 teaspoon sesame oil – adds a distinct nutty aroma.
- 3 tablespoons low sodium soy sauce – adds saltiness and depth of flavor.
- 10 tablespoons sugar – balances the acidity of the vinegar.
- 10 tablespoons white vinegar – creates the signature tangy taste.
- 1 orange, zested – enhances the fresh citrus fragrance.
step-by-step instructions
- Prepare the Oven and Crumbs: Preheat your oven to 400 degrees. Place the panko breadcrumbs in a food processor and pulse several times until the crumbs are much smaller and resemble traditional breadcrumbs.
- Organize Your Breading Station: Set up four separate bowls for an efficient workflow. Place the pulsed panko in the first bowl, the chicken chunks in the second, the beaten eggs in the third, and the flour in the fourth.
- Coat the Chicken Pieces: Dip each piece of chicken into the flour first, followed by the beaten eggs, and finally the panko breadcrumbs. Ensure each piece is fully coated on all sides.
- Bake the Chicken: Arrange the breaded chicken on a baking sheet. Lightly spray the pieces with cooking spray or brush them with vegetable oil to ensure a golden brown finish. Bake for 20-25 minutes.
- Sauté the Aromatics: While the chicken is baking, heat the remaining tablespoon of vegetable oil in a saucepan over medium heat. Add the minced ginger, garlic, and crushed red pepper, cooking for about 30 seconds until they become fragrant.
- Simmer the Glaze: Stir in the vegetable broth, orange juice, sesame oil, soy sauce, sugar, white vinegar, and orange zest. Bring the mixture to a boil and continue to simmer until the sauce thickens into a glossy glaze.
- Final Toss and Serve: Once the chicken is finished baking, remove it from the oven. Immediately toss the hot chicken pieces in the thickened sauce until evenly coated and serve.
Mastering the Baking Process
Pulse Your Panko for a Uniform Coating
Processing the panko breadcrumbs into smaller pieces is essential for this recipe. This prevents the “spiky” texture often found in baked panko dishes and creates a surface that mimics fried chicken. A finer crumb adheres better to the chicken and provides more surface area for the sauce to cling to.
Apply Oil for Maximum Golden Color
Since this chicken is not deep-fried, it needs a small amount of fat to brown properly in the oven. Using a cooking spray or a light brush of vegetable oil helps the panko crisp up and turn golden. This step ensures the chicken doesn’t look pale or dry once it leaves the oven.
Maintain Consistent Chicken Chunk Sizes
Cutting the chicken thighs into uniform, bite-sized pieces ensures that every piece cooks at the same rate. If some pieces are significantly larger than others, the smaller ones may overcook before the larger ones are safe to eat. Aim for roughly one-inch cubes for the best results.
Optimizing the Orange Sauce
Balance the Sweet and Sour Ratio
The combination of 10 tablespoons of sugar and 10 tablespoons of vinegar creates a precise balance. If you prefer a more tart sauce, you can slightly increase the vinegar. Conversely, adding a touch more sugar or a teaspoon of honey can mellow out the acidity if it feels too sharp.
Use Fresh Orange Zest for Aroma
While orange juice provides the bulk of the flavor, the zest contains the essential oils that give the dish its professional fragrance. Always zest the orange before juicing it to get the maximum amount of aromatic peel. This adds a brightness that bottled juices cannot replicate.
Achieve the Perfect Glaze Thickness
The cornstarch is the key to achieving a sauce that coats the chicken without making it soggy. Ensure the sauce reaches a boil to activate the cornstarch’s thickening properties. If the sauce is too thin, simmer it for an additional two minutes before tossing in the chicken.
Ingredient Substitutions and Swaps
Replacing Panko with Other Crumbs
If panko is unavailable, you can use standard dried breadcrumbs, though the texture will be denser. For a gluten-free version, use crushed cornflakes or almond meal mixed with a bit of cornstarch. Ensure the substitute is finely textured to maintain the intended mouthfeel.
Substituting Chicken Thighs for Breast Meat
Chicken thighs are recommended for their juiciness and ability to withstand high oven heat. If you use chicken breasts, reduce the baking time by 3-5 minutes to prevent the meat from becoming dry. You may also want to slightly increase the oil coating to compensate for the leaner meat.
Using Alternative Sweeteners
For a different flavor profile, you can replace the white sugar with brown sugar or maple syrup. Brown sugar adds a deeper, molasses-like sweetness that pairs well with ginger. Maple syrup provides a unique woody note but may require a slight reduction in the total liquid volume.
Serving and Pairing Suggestions
Pairing with Steamed Jasmine Rice
Fragrant jasmine rice is the ideal accompaniment because its neutral flavor absorbs the extra orange glaze. Use a rice cooker or stovetop method to ensure the rice is fluffy and moist. This creates a balanced meal that offsets the intensity of the sauce.
Adding a Side of Sautéed Greens
To add nutritional balance, serve this dish with steamed broccoli, sautéed bok choy, or snap peas. The bitterness of the greens cuts through the sweetness of the orange sauce. Simply sauté the vegetables in a bit of sesame oil and garlic for a complementary side.
Garnishing for a Professional Look
Finish the plated dish with a sprinkle of toasted sesame seeds and thinly sliced green onions. These garnishes add a slight crunch and a pop of color to the plate. A few extra flakes of crushed red pepper can also be added for those who want more heat.
Storage and Preservation
Refrigerating Leftovers Safely
Store any remaining orange chicken in an airtight container in the refrigerator for up to three to four days. Keep the chicken and sauce well-mixed to maintain moisture. Ensure the container is sealed tightly to prevent the chicken from absorbing other fridge odors.
Preventing Sogginess During Storage
Because the chicken is coated in a sugar-based sauce, it will naturally soften over time in the fridge. To minimize this, you can store the baked chicken separately from the sauce and toss them together only when reheating. This preserves as much of the original crispiness as possible.
Freezing the Prepared Chicken
You can freeze the baked chicken pieces before tossing them in the sauce. Once frozen, store them in a freezer-safe bag for up to two months. When you are ready to eat, thaw the chicken in the fridge and reheat it before adding a freshly made batch of sauce.
Reheating for Best Results
Using an Air Fryer for Maximum Crisp
The air fryer is the best tool for reheating baked orange chicken. Place the pieces in the basket at 350 degrees for 3-5 minutes until the edges are crisp again. This method removes excess moisture and restores the texture that is lost during refrigeration.
Oven Reheating for Larger Quantities
If you have a large amount of leftovers, use the oven at 375 degrees on a wire rack. Spread the chicken in a single layer and heat for 5-10 minutes. The wire rack allows hot air to circulate under the chicken, preventing the bottom from becoming soggy.
Avoiding the Microwave for Texture
Microwaving orange chicken often results in a rubbery texture and soggy breading. If a microwave is your only option, heat the chicken in short 30-second bursts. This prevents the meat from overcooking while warming the sauce through.
Troubleshooting Common Issues
Fixing a Sauce That Is Too Thin
If your sauce hasn’t thickened enough to coat the chicken, create a small cornstarch slurry. Mix one teaspoon of cornstarch with one teaspoon of cold water and stir it into the boiling sauce. Continue to simmer for one minute until the desired viscosity is reached.
Preventing the Breading from Peeling
If the breading falls off the chicken, it is usually because the chicken was too damp before dredging. Pat the chicken chunks dry with paper towels before dipping them in flour. This creates a better bond between the meat and the coating.
Balancing an Overly Sour Glaze
If the vinegar flavor is too dominant, do not add more sugar immediately. Instead, add a small amount of orange juice or a pinch of salt to balance the acidity. Stir in small increments and taste after each addition to find the right equilibrium.
Frequently Asked Questions
Can I use a different type of vinegar?
While white vinegar is standard for this copycat recipe, apple cider vinegar is a suitable substitute. It provides a slightly fruitier tang that complements the orange. Avoid using balsamic vinegar as the dark color and strong flavor will overpower the dish.
Is it possible to make this recipe gluten-free?
Yes, you can make this dish gluten-free by replacing the flour with cornstarch or rice flour and using gluten-free breadcrumbs. Ensure the soy sauce used is a certified gluten-free tamari. All other ingredients are naturally gluten-free.
How do I keep the chicken from sticking to the pan?
Use a parchment-lined baking sheet or a silicone mat to prevent sticking. If you don’t have these, ensure the pan is generously greased with oil or cooking spray. This also helps the bottom of the chicken pieces brown more evenly.
Can the sauce be made in advance?
The sauce can be prepared up to a week in advance and stored in a glass jar in the refrigerator. When you are ready to use it, simply reheat it in a saucepan over medium heat. Stir occasionally as it heats up to ensure the cornstarch is evenly distributed.
Print
Crispy Baked Orange Chicken with Zesty Glaze
- Total Time: 30 minutes
- Yield: 6 servings 1x
- Diet: General
Description
Baked Orange Chicken made with Panda Express Orange Chicken Copycat Sauce. An easy baked recipe that’s healthier than frying in 30 minutes!
Ingredients
- 1 cup panko breadcrumbs
- 2 pounds boneless, skinless chicken thighs
- 2 large eggs, beaten
- 1/2 cup flour
- 1 tablespoon vegetable oil, divided
- 1 1/2 tablespoons fresh ginger, minced
- 2 teaspoons garlic, minced
- 1/2 teaspoon crushed red pepper
- 1 tablespoon cornstarch
- 2 tablespoons vegetable broth
- 1/4 cup fresh orange juice
- 1 teaspoon sesame oil
- 3 tablespoons low sodium soy sauce
- 10 tablespoons sugar
- 10 tablespoons white vinegar
- 1 orange, zested
Instructions
- Step: Preheat the oven to 400 degrees and add the panko to a food processor and pulse until the crumbs are much smaller, like regular breadcrumbs.
- Step: Add the panko to one bowl, the chicken (cut into small chunks) in a second bowl, the eggs in a third bowl, and the flour in a fourth bowl.
- Step: Dip the chicken pieces into the flour, then egg, then breadcrumbs and place on baking sheet, then spray with cooking spray (or brush lightly with vegetable oil).
- Step: Bake for 20-25 minutes. While the chicken is baking, make the sauce.
- Step: Add the remaining tablespoon vegetable oil, ginger, garlic, and crushed red pepper to a saucepan on medium heat and cook for 30 seconds until fragrant.
- Step: Add the rest of the sauce ingredients, bring to a boil until it thickens then turn off the heat and wait for the chicken to finish baking, then toss the chicken with the sauce and serve.
Notes
Pulverizing the panko breadcrumbs in a food processor removes the spiky texture, making the result feel more like classic orange chicken. Garnish with green onions, sesame seeds, or extra crushed red peppers.
- Prep Time: 10 minutes
- Cook Time: 20 minutes
- Category: Main Course
- Method: Baking
- Cuisine: Chinese
Nutrition
- Serving Size: 1 serving
- Calories: 424 kcal
- Sugar: 24 g
- Sodium: 524 mg
- Fat: 12 g
- Saturated Fat: 3 g
- Unsaturated Fat: 8 g
- Trans Fat: 0.05 g
- Carbohydrates: 41 g
- Fiber: 1 g
- Protein: 35 g
- Cholesterol: 206 mg